"Rising Up" with Sourdough: A Hamiltonian Adventure
Nourishing the hearts, minds, and bellies of your entire family.

Our family jumped onto the sourdough quarantine bandwagon this August. It has been such a fascinating and brainy experience to work through with my kids. Even though I am posting this in the “belly” category, it nourished our brains in a scientific way as well as our hearts because it has been a nourishing family activity and has connected us to many other baker friends. So while we didn’t adopt a dog during pandemic, we are instead raising a yeast!
We made our own starter from scratch, watched it rise and fall, as we continually listened to and watched Hamilton all summer. I learned that naming your starter was a “thing” and thus “Hamilton” was born; he has “stayed alive;” and has “risen up” ever since. After tasting your own warm, fresh, hard-earned sourdough bread, you too “will never be satisfied” with store bought bread and will “imagine bread so much it feels more like a memory!” It was also wonderful to have friends stop by for starter after it had been so “quiet uptown” during quarantine. As a bit of an introvert, I had become accustomed to not seeing real-life, in-person faces for a while. But when local friends were interested in stopping by for starter, I realized how much I missed true social interactions. Sharing Hamilton and continuing to “tell his story” became a great way to reconnect and rebuild our community! Friends and neighbors, if you are local and haven’t come by for some, please feel free to stop by anytime. We are home and we have discard twice a day! And if you don’t want discard, we seem to have baked goods from discard on a continuous basis!
I wanted to share all of our resources and research in one place for the current community and any new friends who want to embark on this journey as well. Below you will find two of the sourdough recipes we have tried as well as several sourdough discard recipes we have been making on the side (because I hate wasting my discard).
Sourdough Bread 101 Quick Links:
Starter recipe by CLEVER CARROT
Easy Beginner Bread Video by the Prairie Homestead
Jump to the Easy Beginner Bread Recipe by the Prairie Homestead
Decreasing your starter by King Arthur
Maintaining and/or Refrigerating your Starter by King Arthur
Sourdough Starter Discard Recipe Quick Links (scroll to the bottom for flavor edits and quantity suggestions for these recipes below)
Pumpkin Bread
Pancakes
Blueberry Muffins
Banana Bread
Buttery biscuits
Zucchini Bread
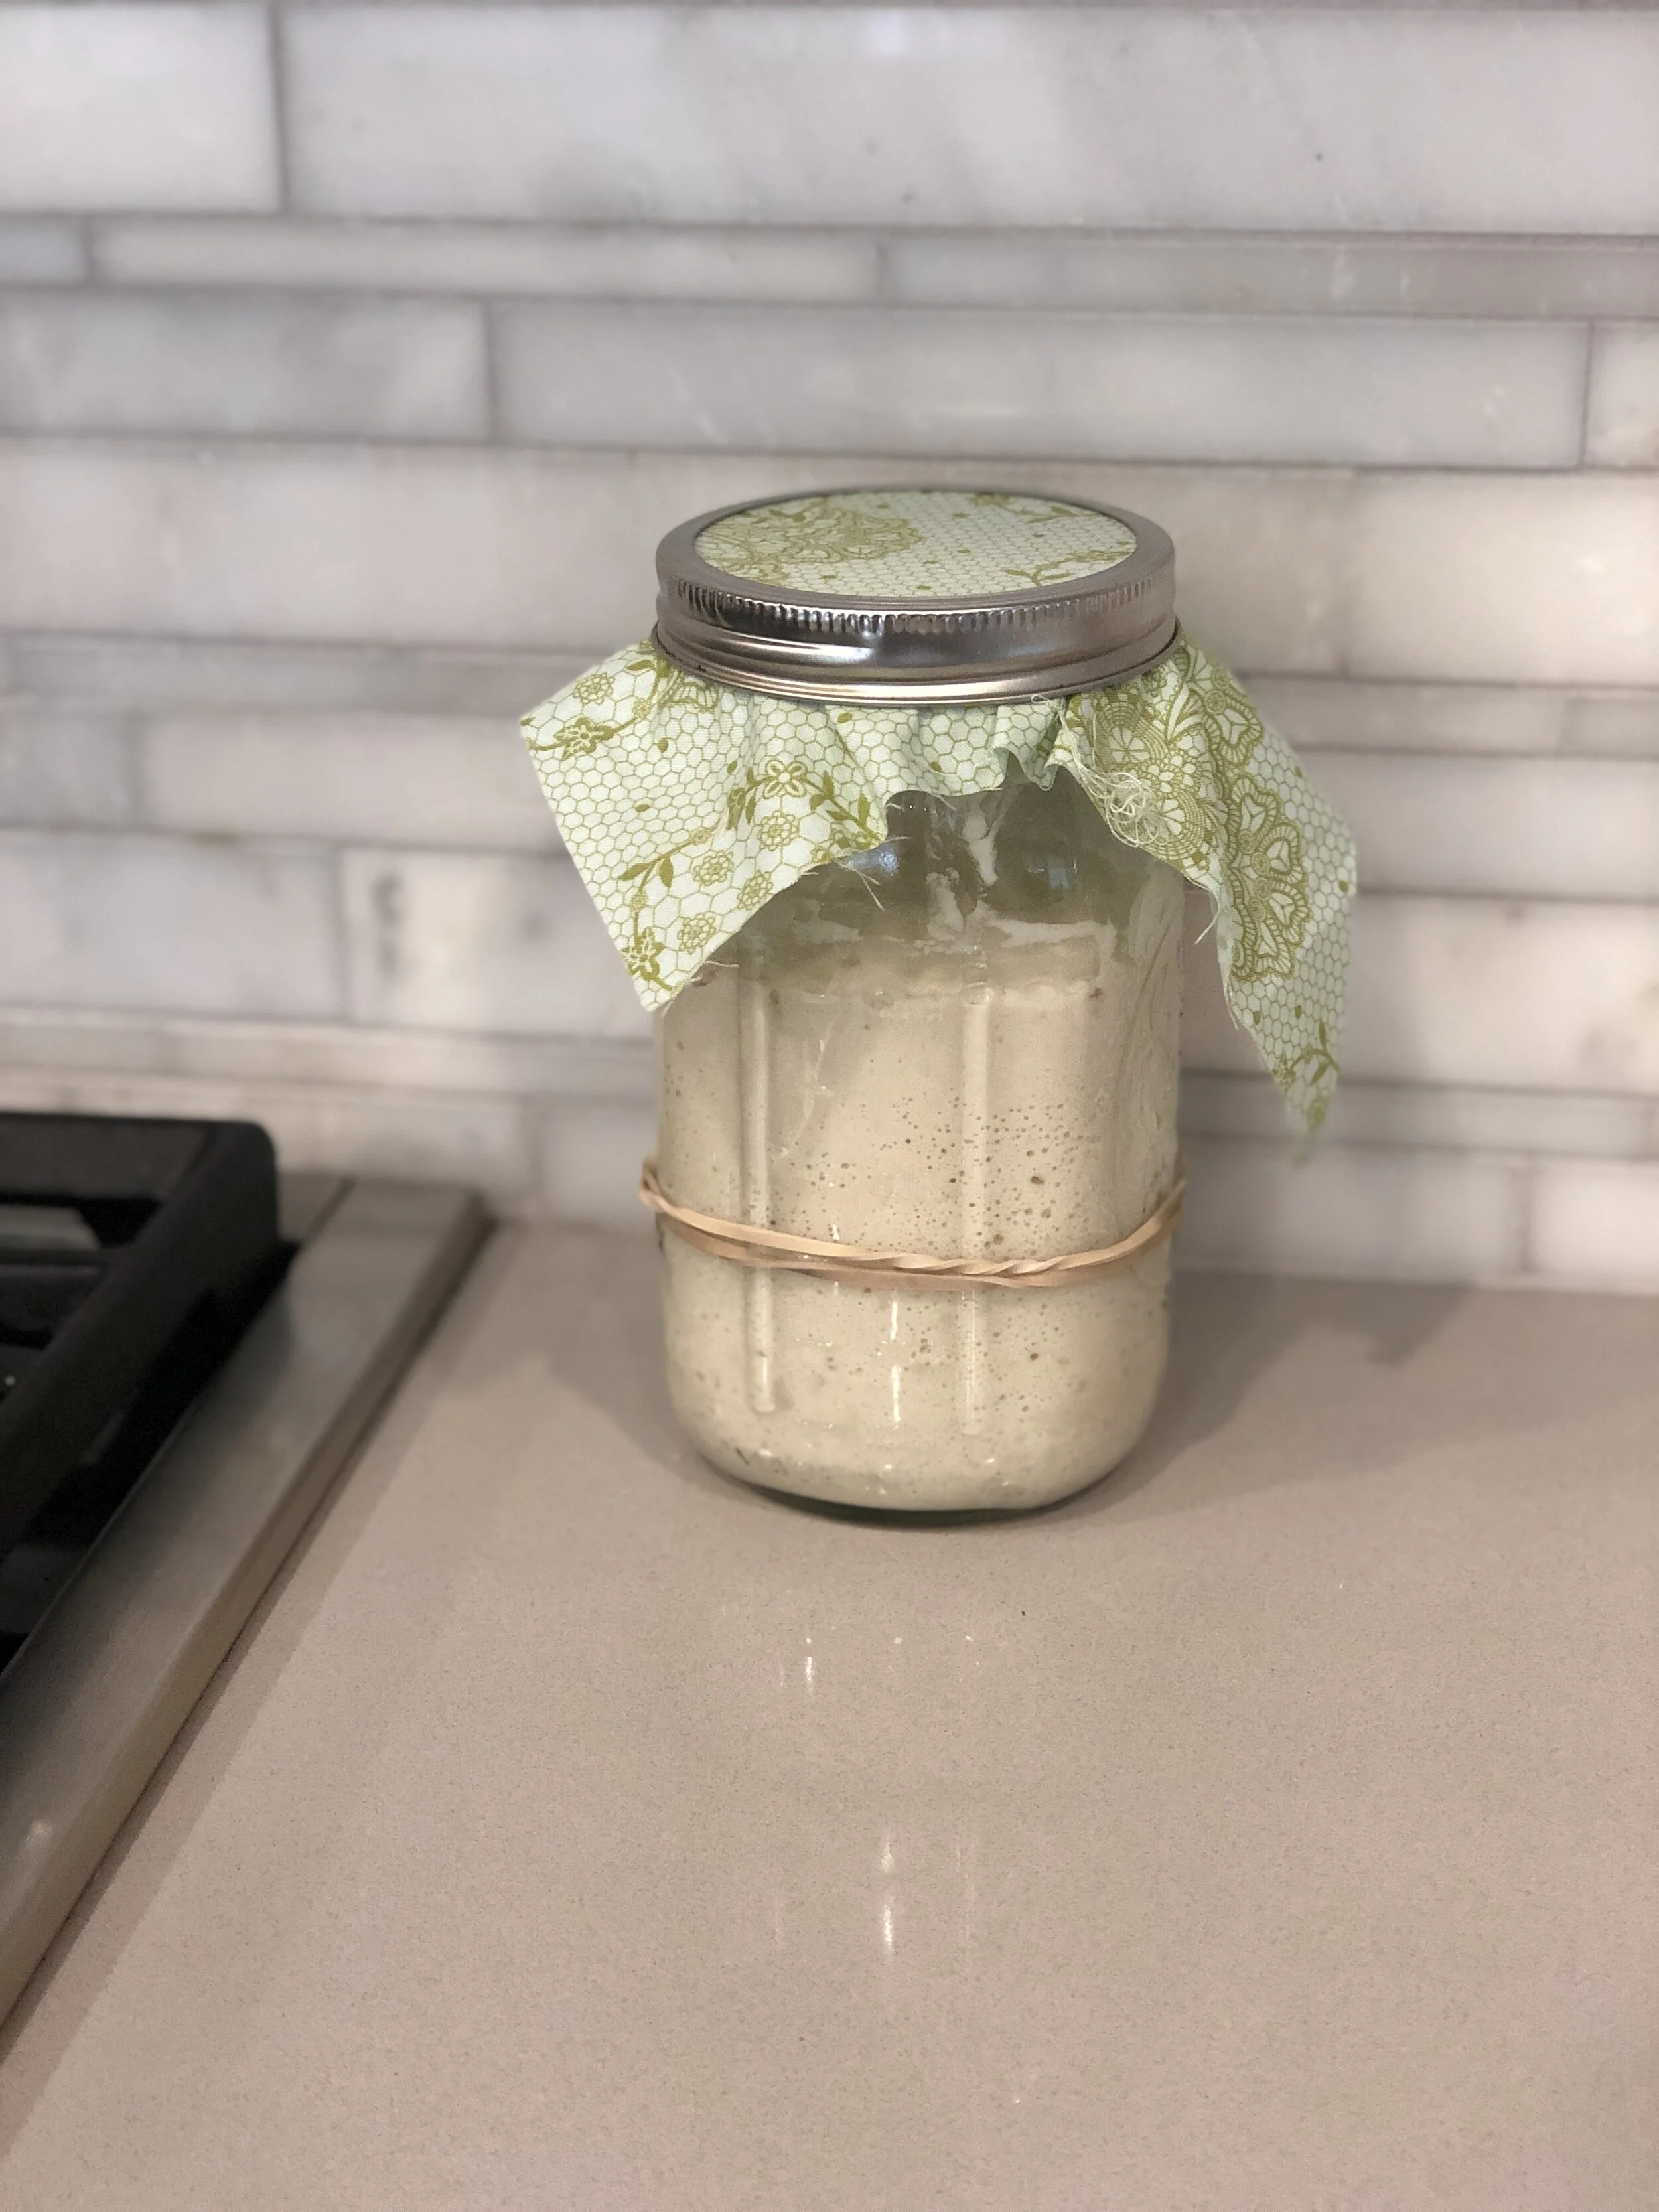
We made our own starter based on directions and videos we found online. If you want to make your own starter you stir 4 oz of flour and 4 oz of water together in a large clear jar (because it will grow). You continue to feed in the same ratio every day, but after the first rise, you continue the ratio with 4 oz of starter, 4 oz of flour and 4 oz water. This takes about 5-7 days before its ready to use for baking. It should smell like sourdough, a little sour, a little like vinegar and eventually like red wine. If it smells like something you wouldn’t eat, then its probably no good. If you are local our tap water is chlorinated so you shouldn’t feed the starter using it because the chlorine will kill the bacterias. Instead, you can leave tap water on the counter for 24 hours until the chlorine evaporates and then use that water to feed. Or just come over and get some from me! Below you can get an idea of what the starter should look like (first, very bubbly) and how much it rises over time (second, a few hours after a feeding as marked; third, at the peak when it’s ready for baking). I like using a small scrap of fabric over my jar with a tight rubber band or the mason jar lid so I can watch the progress and know when it’s ready to bake. I also like to put a rubber band to mark the spot where the starter is right after I feed it. Here are the directions and video we watched to start ours by “Kitchn”.


Recipe Bake Off
I then received recipes from two friends for how to make our first loaf. One recipe was from a neighbor who is also a pandemic-inspired sourdough baker and the other is from a friend who has been baking sourdough for a while. I tasted his last year and it was amazingly good. So I wanted to try both. We started with the beginner recipe, which I strongly suggest any beginner start with (and possibly end with too!). Here is the beginner easy recipe from The Prairie Homestead. I love this recipe. I recommend you watch the video a few times before you start and take notice of her very interesting homestead life, for example, she has a baby cow in her mudroom! I love that the recipe doesn’t require too much hand-holding, folding and babysitting before baking. Almost all of the rising happens while I am asleep. We get a delicious loaf for the family and every time it tastes better than the last. And now that I have a fancy brotform (proofing basket) and a lame (fancy word for a razor blade), the over all look “blows us all away!”
Typical routine for an afternoon fresh loaf:
If you are like me, one of the reasons you haven’t starting baking sourdough yet is because the time schedule seems intimidating. So I am sharing mine here.
Day 1:
5 p.m.: feed starter, watch it rise, and when it’s at its active peak you are ready to prep the dough. This usually takes between 3-4 hours.
9 p.m.: test the starter to see if it floats in water. If it floats, it’s ready to bake. Make your “shaggy” dough ball and cover for 30 minutes while all the flour hydrates.
9:30 p.m.: uncover and reform your dough ball. Cover and sleep – let rest for about 8-9 hours. She suggests 8 hours, but sometimes I have slept in and its been ok.
Day 2:
6 a.m.: Your dough ball will be much larger. Dust your counter with flour and carefully place dough on top. Stretch and fold the dough into a ball. Let sit for 30 minutes.
6:30 a.m. Stretch and fold again, shape it into a tight ball. Place in a well floured proofing basket (mix of rice flour and all purpose flour helps prevent sticking) for 2-3 hours, cover. (Note, sometimes I use wet hands before I perform the stretch and folds because the dough is easier to work with and less sticky).
9 a.m. preheat oven to 450 degrees.
9:30 a.m. flip out your dough onto parchment, slash the top and place into your dutch oven. Bake for an hour (20 minutes with the lid, and 30 minutes without). By 10:30 a.m. the bread is out of the oven. Let it cool for a good 30 minutes to an hour before slicing. House smells great, lunch tastes amazing!


I tried making two loaves in one day, one with this recipe and one with the Kitchn recipe which is modified for a home baker from the Tartine cookbook. While the Tartine process wasn’t necessarily difficult, it was drawn out and required more patience. Full disclosure, I cut the recipe down because it makes 2 loaves and I didn’t want to experiment with such a large amount. So I might have “thrown away my shot,” but I don’t think I will try it again any time soon. My dough never really got tight. Even after 2.5 hours of stretching and folding every 30 minutes it never stayed in a tight ball. It just ended up sprawling out like the blob.

Here’s the blob. It’s NOT supposed to do this after folding and shaping. I even added dry flour a few times.

Even after the final proof in the basket it looked like this. It was so unsatisfying. But I still didn’t throw away my shot. I squeezed the blob into my 3.5 quart dutch oven and hoped for the best.
The Tartine recipe gave me a tasty sour loaf, but was much more dense and hard to chew (my jaw tires easily, which is why I don’t really enjoy bagels). The Prairie Homestead recipe actually produced my best loaf yet….but I have had more practice with it so that could have been a major factor.
Here’s the side by side comparison.

Left is the Tartine/Kitchn recipe, right is the Prairie Homestead. Both baked in the 3.5 quart Dutch Oven.
Eventually, my dense loaf became very tasty croutons. Tossed them in basil olive oil, salt, pepper and parmesan cheese and baked them at 350 for 8 minutes. Kids ate their salad!

Overall, my recommendation is to start with the Prairie Homestead recipe and then get curious about other recipes such as the Tartine one or this one from a Chicago baker who provides excellent instructions. See where your skills take you.
One other warning so you can learn from my mistakes. Many recipes or tips will suggest that you let your dough rise overnight in your oven with the light on. In CA this isn’t really necessary at any point of the year, but I still wanted to try to see if my dough would rise more. First, most websites don’t tell you to turn the light on for a few minutes and then turn it off! So I kept it in the oven all night with the light on. When I woke up the oven felt hot, like 90 degrees. My dough was a bit crusty on top, flat, and a gooey hot mess underneath. If you live somewhere cold maybe you will need to use your oven, but if you do, be sure to turn off the light after the oven reaches that magical 70 degree mark. Otherwise you will end up with this mess:


Raising Hamilton
The starter can be maintained on the counter, which requires two feedings a day;\ or in the fridge, where you can feed it once a week. King Arthur’s website provides some great tips on sourdough maintenance. I am currently keeping mine on the counter because I think it tastes better and better the more it is fed. I have decreased my starter though, so that I am wasting less flour. I used to maintain a 4:4:4 ounce ratio and now I am at 2:2:2 ounce ratio, which comes out to 60 grams of starter, 60 grams of flour and 60 grams of water.
Discard Recipes
So what do you do with all that discard if you don’t want to throw it away?
The easiest and fastest thing to make is a simple crepe with just the discard and some seasoning. I have made savory crepes with Everything but the Bagel spice pretty often.

Everything but the Bagel spice and a little extra salt. Be sure to eat them off the griddle though b/c after they get cold the texture isn’t great. Add cream cheese or a sunny-side up egg for a delicious breakfast!
If you have ever had South Indian Uttapam, you can make a version of that too with ginger, garlic, tomato, onion and cilantro. We also made sweet and tangy crepes with a little sugar, cinnamon and allspice with whip cream on the side.
To make these grease your pan and pour some starter mix on the pan like you would a pancake, but then spread it out in a circular motion to make it thinner, like a crepe. Flip it when it looks almost cooked on top. I like the crispy so I cook them for longer.
There are tons of other delicious discard recipes for the family too. Here are some of my tried and tested favorites so far and some I want to try, but there are millions more online. The widest selection can be found at King Arthur and Leavenly.
Blueberry Muffins:
This makes about 11-12 small muffins. I cut the sugar topping recipe in half and used coconut oil for the batter instead of butter. Jay and the kids finish these in a day!

Sourdough Pancakes:
Light, fluffy and delicious. However, this makes too many pancakes for our family so I would cut this in half or give half the batter to a friend. We add pumpkin spice and chocolate chips or blueberries to the batter too!

Xander’s 11th Birthday Stack
Pumpkin Bread:
Keep recipe as is, it’s amazing. And for the oil, we used coconut. The best discard recipe so far. We added flake sea salt on top, because we do that with all baked goods

Buttery biscuits:
The kids love these as a 10am snack with butter and jam.

I can’t take credit for these, Xander will ready them before school starts for me to bake before his 10am snack.
Banana Bread:
Add a teaspoon of cinnamon if you like. If you have both sourdough starter and ripe bananas that you don’t want to waste, here’s a slam dunk easy recipe. I found that it needed a bit more saltiness, so slab on some Kerry Gold Salted butter or double the salt and its a delight!
Zucchini Bread:
We are pretty avid zucchini bread bakers without starter and have perfected a traditional recipe to our liking, so I am listing it here but will write up our recipe in another post.
I hope you enjoyed my overuse of Hamilton references (even though there is no such thing as overusing it) but more importantly we hope we inspired you to embark on this mind, body and heart journey during quarantine and beyond. Call me if you want some starter “in your own house” too! And if you have any favorite discard recipes please share the links in the comments below so we can … continue to tell this story!